How to Add and Format Lists in Stickies app for Mac

In Apple devices, one can create notes and lists using multiple apps. One can use the stock Notes app or access the Mail Notes feature. Apart from this, the other options include Keychain Access, TextEdit, and last but not the least, the Stickies application.

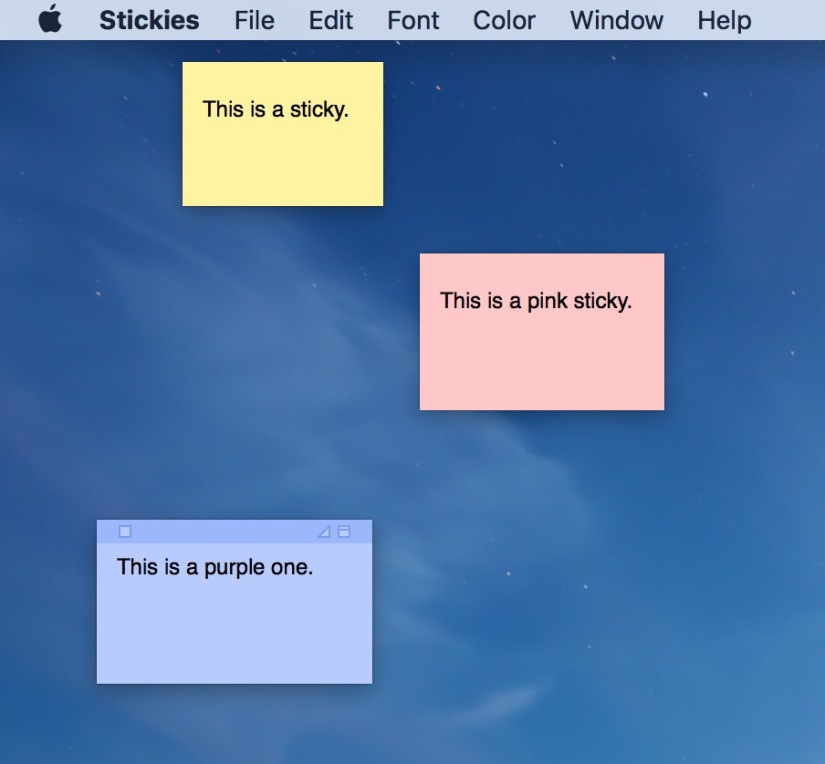
Stickies is a hidden gem that lies in the Applications folder. It has been a part of the Applications folder since a long while. If you have used Windows PC, then you must be familiar with Sticky Notes. Well, Stickies is quite similar to that. If you often have chores to do and errands to run, then you must consider adding lists on your Mac. Let’s check out the process to make and format lists using the Stickies app.

Making lists using the Stickies app in Mac

  1. Go to the Applications folder and launch Stickies.
  2. Now, place the cursor within the body of the note.
  3. Hit the Option and Tab keys simultaneously.
  4. Now, a bullet will get inserted.
  5. Add the first item in the list.
  6. Press the Return key and key in the second item.
  7. Repeat this process until your list is complete.
  8. If you want to finish the list, then press the Return key two times.

mac

Formatting Stickies lists in Mac

Mac users can switch the List formats with just a few clicks. They can change the font, select another character for the bullets, switch to a numbered list, and insert prefix or suffix. Here’s how:

  1. Select any item in the list.
  2. Long press the Control button and click from the mouse.
  3. In the pop-out menu, click on the List option.
  4. In the next prompt, you can choose the formatting as per your wish.

Summary

It is easy to fall in love with the Stickies app. You can create lists of tasks to complete, things to buy, etc., and place it on your Mac desktop. This way, you will not forget your essential school, professional, or personal assignments and tasks.

Graccey Leio is a self-professed security specialist; she has been manufacture the people aware of the security threats. Her obsession is to write about Cybersecurity, cryptography, malware, societal engineering, internet and new media. She writes for McAfee security products at mcafee.com/activate.

Source: McAfee.com/Activate

How to Install Malwarebytes Anti-Malware?

This Malwarebytes Anti-Malware is an addition of antivirus software which helps you by preventing through different spyware, adware, or some potentially unwanted programs and some other malicious or any irritating or annoying software from a Windows computer system. In short, it helps you in protecting your Windows computer from many dangerous viruses, which might internally damage your computer system.

However, this Malwarebytes Anti Malware is available for all users in two ways like a Free version, which always requires some free updates and scans. And a Paid version cost you 40$/ year, if you paid $40 then it will provide you with all the latest feature such as it runs automatically and also includes some active antivirus protection. This application is very much easy and simple. If you follow few simple steps which we provide you in this article, this procedure will be more easy for you if you follow it on the provided sequence and also take your less time and fewer efforts.

Anti-malwarebytes

STEPS TO USE AND INSTALL MALWAREBYTES ANTI-MALWARE

The truth is that the Malware bytes will never be allowed any user to download the free version of it directly. Alternatively, you just need to download and install its 14- day trial of the paid version. You just need to ignore all the suggestions and upgrade to the paid version, and the software will automatically revert it to the free versions almost after two weeks.

Here the whole procedure of how to easily install and use Malwarebytes Anti-Malware on your Windows computer. The steps are given below:

  1. Click to go to the Malwarebytes Anti-Malware website.
  2. Click on the Free Download option.
  3. Now, it will direct you to some other page, and the download will begin automatically.
  4. Click on the Click Here option, only if the process of downloading has not begun
  5. Then, click on the Run tab, if any dialogue box appears on the bottom of your browser window and asking you to run Malwarebytes Anti-Malware.
  6. Now, double-click on the Installer to download folder.
  7. Choose your Language from the given option.
  8. And Click on the OK option.
  9. On the other hand, click on the Next Option. Once, the Malwarebytes Anti-Malware Setup Wizard window will show on your screen.
  10. Choose ‘I accept the agreement’ option, when any License Agreement dialogue option appears on your screen.
  11. Click on Next option.
  12. Again, click on the Next option, when Setup dialogue box will appear on your screen.
  13. Then, click on the Next option appears in the Select Destination Location dialogue box window.
  14. Click Next option appears in the Select Start Menu Folder dialogue box Window.
  15. Lastly, click on the Next option appears in the Select Additional Tasks dialogue box Window.
  16. Now, select that option which you want.
  17. Finally, click on the Install option appears in the ‘Ready to Install’ dialogue box.
  18. Click on the Finish tab which appears in the Malwarebytes Anti-Malware Setup Wizard after completing the process of installation.

Hopefully, this above-given procedure will surely help you in installing the Malwarebytes Anti-Malware antivirus software on your computer software.

Graccey Leio is a self-professed security specialist; she has been manufacture the people aware of the security threats. Her obsession is to write about Cybersecurity, cryptography, malware, societal engineering, internet and new media. She writes for McAfee security products at mcafee.com/activate

Source: McAfee.com/Activate

How to Fix Error Code 49?

Whenever the Device Manager Error Code 49 occurred on your screen, it simply signifies that the system hive has been exceeded its size limit. The term System Hive is the core part of the Windows. Generally, the Windows Registry includes a System Hive.

In this post, we provide you the best solutions which help you in solving the error code 49. While the error device manager 49 occurred, then it shows a message like:

Windows cannot start new hardware devices because the system hive is too large (exceeds the Registry Size Limit), (Code 49).

At times, it might be possible that the device or devices are no longer attached to the computer system, but still, they all are listed in the system hive of the windows registry. Just envisage that if you were removing the applications and hardware for years, but still they were never removed from the registry. However, the size of the hive always keeps growing until it reached the maximum limits.

error

Fix Error Code 49

As we know, the registry is so much important and also very multifarious, so that to change anything manually is not safe for the users even the users has very good knowledge about it. It is a eternal part of the registry associated with a set of many files that contains detailed information which is related to the configuration of the computer system on which the operating system is already installed.

We provide you with the only way to solve this error code 49 are to easily remove or uninstall any hardware devices which you are no longer in use with the system.

However, by default, Device Manager hides some devices. So to solve the error code 49, you need to follow the methods or steps which are discussed below. But to save the time you need to follow all the methods or steps in ascending order. The steps are discussed below:

  1. Firstly, set Device Manager for showing those devices which are no longer connected to your system:
  • Launch Run option.
  • Then, type cmd, it will automatically open the command prompt.
  • Alternatively, type the below given command:
  • set devmgr_show_nonpresent_devices=1
  • Click on Enter.
  • Finally, it will enable hidden devices option.
  1. Next, press Win +X + M together to open the Device Manager.
  2. Click on the View option.
  3. Then, select Show hidden devices option.
  4. Choose a non-present device.
  5. Subsequently, on the Driver tab, select Uninstall option.
  6. If any non-present devices are still available which you are no longer using, then you need to uninstall them all permanently by repeating the 3 and 4 steps.
  7. Click to restart your system.

Once most or all the device have been removed, then you just need to check the device properties dialog box in the Device manager only to know that the error is resolved.

Hopefully, these steps will surely help you in solving the error, but still facing any problem connected with the support team. They are offers you best solution.

Graccey Leio is a self-professed security specialist; she has been manufacture the people aware of the security threats. Her obsession is to write about Cybersecurity, cryptography, malware, societal engineering, internet and new media. She writes for McAfee security products at mcafee.com/activate

Source: https://my-mcafeeactivate.com/how-to-fix-error-code-49/

How Can You Convert Videos from YouTube to GIF?

If you ever saw a video on YouTube that would make an awesome looking animated GIF, you must have wished to make one your own. Well, by using any free video converter, you can download videos, plus, trim and convert them directly from YouTube.

You can now perform many creative things with YouTube videos! You can create GIFs using clips from Facebook, Vimeo, DailyMotion, and pretty well any other Video Hosting website.

Note: Before you begin, however, remember that using third-party apps to download videos is not in favor of YouTube’s terms of service. Downloading videos is also a potential copyright encroachment unless the video belongs to you. You need to get permission from the copyright holder, or else it should be in the public domain.

youtube-to-gif-2

  1. Download & Install any Video Converter free

First of all, you need to download and install any video converter free. The installer here contains a free of cost McAfee Security Scan Plus trail – it’s nothing malicious. But if you want to skip it, you need to uncheck the checkbox when it appears. As soon as the program is installed, you can get started right away by launching it.

  1. Download any YouTube video

Launch your web browser, and then find the YouTube video you wish to convert to GIF format. After that, you have to copy the URL from the address bar. Come again to Any Video Converter Free, tap the ‘Add URL(s)’ option, click the ‘+’ icon and press the Ctrl + V keys simultaneously to paste the address into the text box provided. Also, you can drag and drop the video from Firefox or Chrome, if you favor. Once you’re done, tap ‘Start download.’

  1. Trim the YouTube video you’ve downloaded

GIFs look more attractive when they’re short and snappy, so it’s always a good idea to make your YouTube video short of few seconds by trimming it. Tap on the scissor icon beside a downloaded video; scrub through until you get the point where you want your GIF to start. Tap on the Trim button, and click to set the endpoint. When you think you’ve reached to the point you wanted, tap ‘Apply,’ then tap ‘OK.’ After that, you’ll see your trimmed video straightforwardly available underneath the original one in the file management panel. Tap to select it.

  1. Finally, convert your YouTube video to GIF

Now you are all set to convert the YouTube video into a GIF. Tap on the format drop-down menu, select ‘Video files’ option, after that, scroll all the way down to ‘GIF Animation Format.’ Up next, you need to click GIF Animation Format to select it, and then press the blue ‘Convert now’ button.

Doing so will show up progress as your video is converted. Once it’s done, go back and start enjoying the GIF you’ve created from YouTube. All the best!

Graccey Leio is a self-professed security specialist; she has been manufacture the people aware of the security threats. Her obsession is to write about Cybersecurity, cryptography, malware, societal engineering, internet and new media. She writes for McAfee security products at mcafee.com/activate

Source: https://my-mcafeeactivate.com/how-can-you-convert-videos-from-youtube-to-gif/

How to Organize and Import Audiobooks into iTunes

If you are looking for how to sort audiobooks on an iOS device, you will be happy to learn a few ways to do that. You can purchase audiobooks from Apple for adding to your collection. But maybe you have already added a bunch of audiobooks or CDs that you want to add to your iTunes library. It sounds like a simple process. Importing them is quite easy but organizing them may take a little more time. By default, audiobooks are dumped into Music library instead of Audiobooks library. iTunes often fails to apply right album art to your imported audiobooks. It is although possible to correct both the problems.

Importing Audiobooks From CDs

Start iTunes. Your audiobook probably comes on multiple CDs. Insert the first CD into your computer’s CD/DVD tray. A small square window will pop up with multiple CD results. Tap result that best matches name and description of the audiobook and clicks OK.

Importing Audiobooks into iTunes

iTunes will ask if you would like to import CD into the library. Tap yes and iTunes will begin the process of importing.

itunes-create-audio-book06.png

Eject Audiobook CD

iTunes alerts you after the CD is imported. Tap the eject button in upper right corner and swap first CD with the SEcond CD. Keep repeating the process till all CDs are imported into your library of iTunes.

View Imported CD

So now you have imported final CD for the audiobook. The entire book can be viewed in your music library, either by browsing to it or by peeking in Recently Added section.

Edit Album Data

Now the challenge is to fix the problems and organizing the entire book. It is possible that you may not like the titles given to each imported discs. Click right on of the imported discs and choose Album info from the pop-up menu.

In the Album field, change existing name to the one you want to use, remember to add a phrase such as Disc1 at the end of the name. If you want to use a similar name for other discs, choose and copy the entire name. Now Click OK. Click right on Disc2 and choose Album Info. Now paste copied Album to Album field and change Disc1 to Disc2. It is also possible to type a name for album artist and meaning the author if it is missing. When you type some letters, iTunes predicts the name and shows potential matches. Choose the Appropriate match a Click OK. Repeat same steps for remaining audiobook disc in your library.

Edit Title Track Data

Click on each imported disc for viewing titles for each track. It is possible that you may find some tracks with wrong names. Right-click on one of those tracks and click on song information.

Change Title Name

Type the name you want to give the song in the Song field. Tap OK. Repeat those steps for all the tracks you want to change the name of.

Finding Lost Album Art

Once you are done with importing your CD, you may find that it doesn’t have any album art attached to it. iTunes may not be successful in tracking down the correct art. Go to your web browser and conduct image search for the audiobook. Look for the right image and click right on it to save it to your device.

Graccey Leio is a self-professed security specialist; she has been manufacture the people aware of the security threats. Her obsession is to write about Cybersecurity, cryptography, malware, societal engineering, internet and new media. She writes for McAfee security products at mcafee.com/activate

Source: http://my-mcafeeactivate.com/how-to-organize-and-import-audiobooks-into-itunes/